Step 1: Install Goose Desktop
- Visit Goose’s official documentation: Goose Quickstart.
- Select the installer for your operating system and complete the Goose Desktop setup.
Step 2: Create New Provider
- Open the Goose Desktop application and navigate to the main interface.
- Find and click “Create New Provider” in the left-hand menu.
- Follow the prompts to enter the required information and complete creating a new Provider.

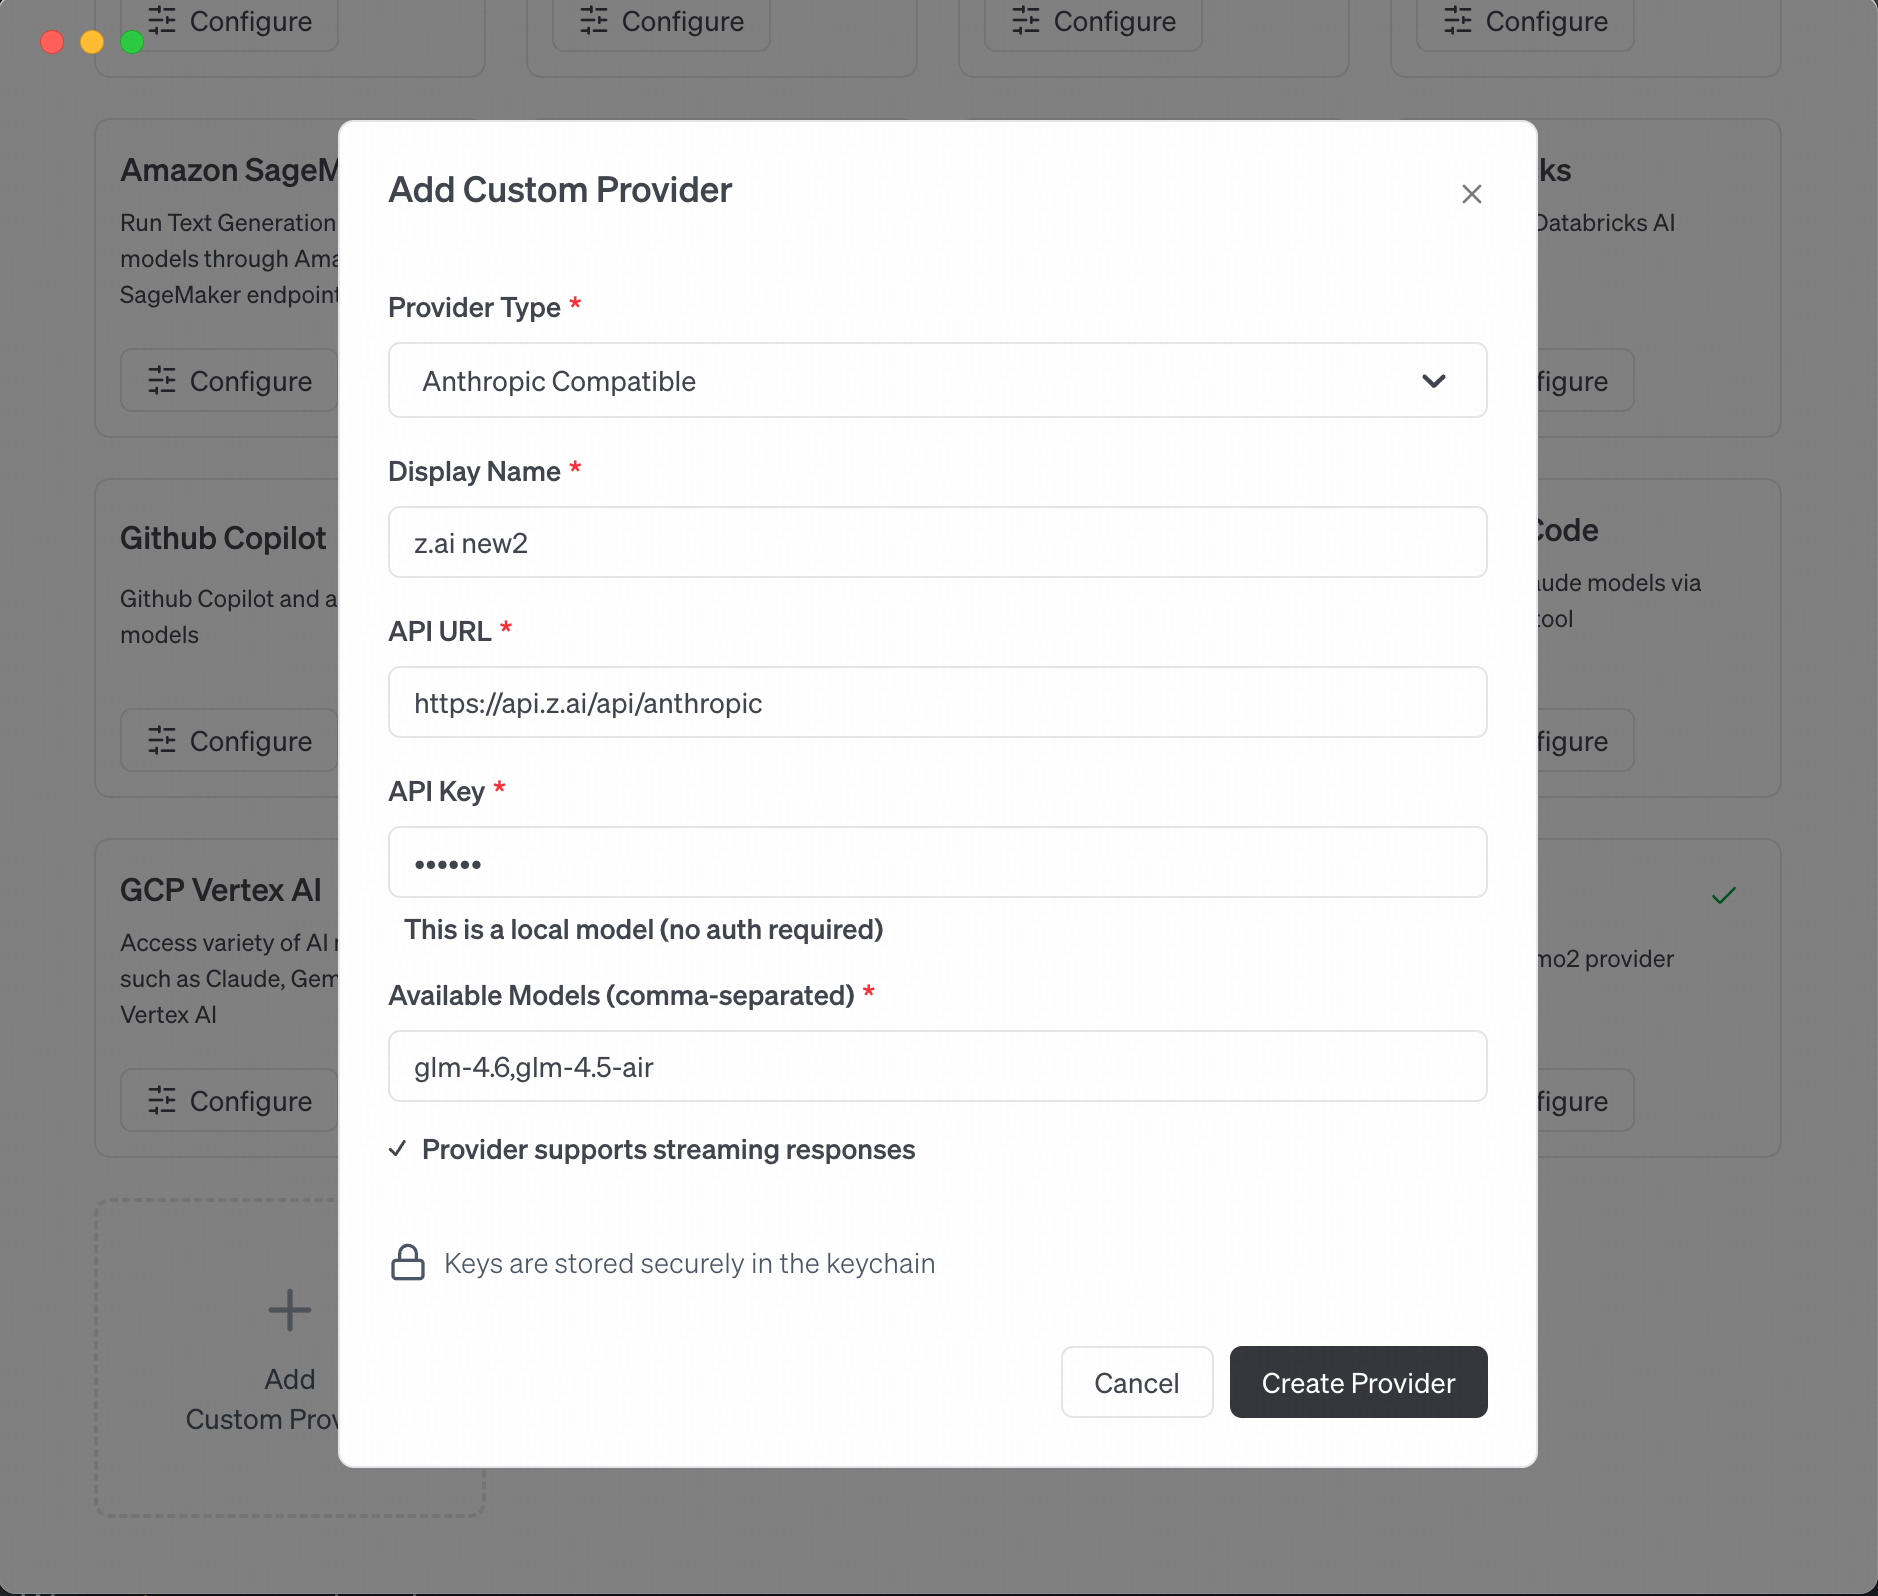
Step 3: Select Anthropic Compatible and Configure
- In Provider Setup, select Anthropic Compatible.
-
Complete the required configurations:
- Base URL:
- API Key: Your VibeCodeCheap API key
- Model: Choose
claude-opus-4-5-20251101(standard, complex tasks) orgemini-3-flash(lightweight, faster response) based on your requirements.
- Save settings to complete the configuration.
Step 4: Switching Models
- After configuration, return to the Goose desktop main interface.
- Find and click “Switch Models” at the bottom of the main interface.
- Select the newly created Provider from the dropdown list.
- Verify the new Provider has successfully switched to the current model.

Step 5: Start Using Goose
- When the provider is active, you can start interacting with Goose powered by claude-opus-4-5-20251101.
- Enter your request, and Goose will automatically invoke the claude-opus-4-5-20251101 model based on the configuration to generate a response.
